Learn how to tighten the low end of your mix with these five mixing tips. These basic mixing techniques will help you achieve punch, clarity, and presence.
How To Mix The Low End of Your Song
The low end of a song acts as the foundation of your mix. It is the support system for all other elements. The decisions you make while mixing the low end may make or break your song.
These five suggestive mixing techniques will help you achieve a clear and punchy foundation for your mix. Learn how to add punch, clarity, balance, and presence with these tips:
1. Cutting Unnecessary Frequencies
Cutting useless sub frequencies from other instruments is an excellent place to start when trying to achieve a defined low end. Using a high pass filter, go through all the elements in the mix and cut sub frequencies that could conflict with the kick and bass.
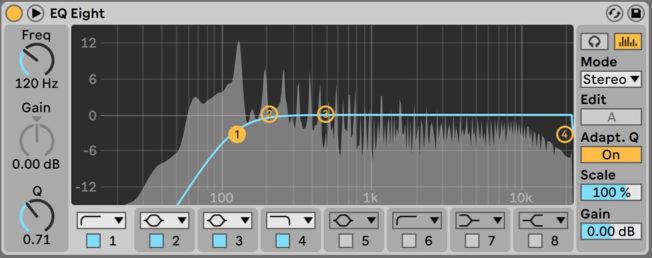
Various sounds in your song could have subsonic frequencies you can’t hear. These “extra frequencies” don’t contribute to the timbre of a sound. Also, a build-up of these low frequencies can create muddiness, phase cancelation, and other problems in your mix. Keeping the low end clear of this useless rumble is crucial. The goal is to leave room for your low-frequency sounds. Low-end elements include the kick, sub bass, main bass sounds, and 808s.
To combat problematic frequencies, apply a low-cut filter on sounds that are not part of the low end. Where you cut depends on the song and the sounds. I like to low cut frequencies anywhere from 60hz – 120hz. However, cut with caution. Cutting too many frequencies on each sound/track can make your song lose body and feel weak. Also, use both your ears and spectrum analyzers. Ensure your cutting problematic frequencies without sacrificing the impact of your song. Reference if need be and don’t forget to toggle your subwoofer on and off as you mix.
Also, the kick and bass can generate useless rumble. Try cutting anywhere below 40 Hz to tighten up either sound. You may be surprised how much louder the mix will sound after removing frequencies that don’t contribute to the song.
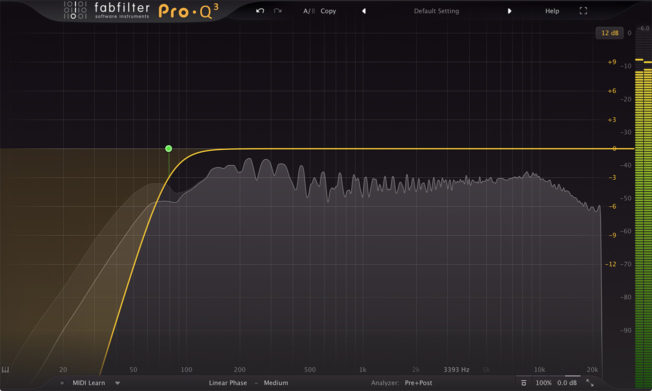
Moreover, keep in mind each EQ will sound different. I’d recommend using something passive like FabFilter’s Pro-Q3. It also has a linear-phase option that helps reduce phase problems when cutting frequencies.
2. Check the Low End in Mono
Checking your mix in mono is vital. Listening to your low end in mono helps identify issues with the stereo image, phasing, volume, clarity, and more. Mixing in mono also helps ensure your mix translates on mono speaker systems.
Another good trick is to use Ableton Live’s Multiband Compressor on your master (or any multiband compressor). Then, solo the low band so you can hear everything playing in the low end. This will act as a low pass filter so you can focus on the low end without getting distracted by the stereo imaging some sounds may have. It also helps you identify problems. For example:
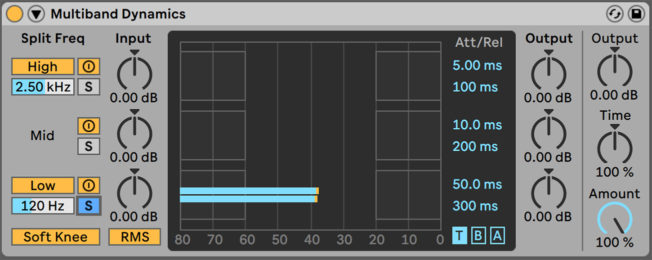
- You can keep a gauge on any phasing happening in your low end.
- You can turn off your bass tracks and listen for other instruments that might be bleeding into the sub frequency range. This method makes it easy to find those problem instruments. From there, drop a low-cut EQ on instruments bleeding into the low end.
3. Kick and Bass Correlation
The kick and bass are among the two most essential elements in electronic music. Careful attention to kick and bass relationships is crucial!
Kick and bass correlation is challenging and often overlooked. These general mixing tips will help tighten your kick and bass:
[yuzo]
Mono the Kick and Lower Bass Frequencies
Having low frequencies in mono retains punch, helps avoid phasing, and allows the low end to translate on mono speaker systems. Also, low frequencies carry a lot of energy and will occupy more space in a mix than higher frequencies. Centering them clears space for elements with stereo information.
Sidechain the Kick to Your Bass
Sidechaining drops the bass volume every time the kick strikes. This technique will allow the kick to come through the mix more clearly and will give it more of an impact. Sidechaining is also the best way to avoid phasing and frequency masking between the two.
Also, use a short ghost kick trigger. I like to shorten the kick tail to make the sidechain compressor react faster. I also like dialing in the sidechain compression with a multiband compressor on the master. For example, try soloing the low band and then increase the release on the sidechain compressor to hear how the sub is communicating with your kick.
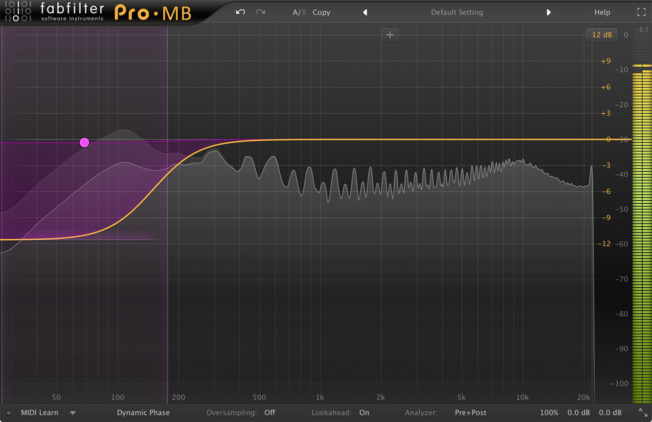
Last, try sidechaining with a multiband compressor. Plugins like Waves F6 and FabFilter’s Pro-MB can sidechain a specific frequency band. For example, duck only the low end of your bass every time the kick strikes instead of lowering the entire bass. This technique will also reduce sidechain pumping which sounds more natural.
Identify the Dominate Sound
Know which instrument is your lead. Choose which sound will be the deepest one in your mix. For example, if your kick is more dominant than your bass, then cut the lows out of your bass enough to let the kick fill in those low-end frequencies. Conversely, if the bass is the main focus, have the kick knock higher to avoid frequency conflicts.
You can also transpose the kick if it is conflicting with the bass. For instance, try transposing the kick to the 5th (seven semitones higher). This move adds separation while also staying in key.
Check the Kick and Bass Length
Pay attention to the size of your kick and bass. For example, long kick tails can interfere with a busy bassline. Focus on creating a contrast between the kick and bass. For instance, pair a short kick with long or deep bass notes. Conversely, if your bass notes are spread out, try using a boomy kick to fill in the space. This technique helps to reduce frequency masking conflicts. It also allows the kick and bass to groove better.
Check for Frequency Masking
Frequency masking between the kick and bass causes several problems. Use an analyzer or solo the kick and bass to identify conflicting frequency areas.
Fix frequency masking with an EQ or sidechain compression. For example, if you boost the kick fundamental with an EQ, try cutting that same frequency from the bass to reduce masking.
4. Compare Your Mix with a Reference Track
Reference tracks are professionally mixed and mastered songs you use as a tool to measure your mix against.
Referencing is one of the best and most helpful mixing techniques to learn. Comparing your mix to a commercial ready track will help you achieve pro-sounding mixdowns and masters.
Reference tracks also guide your mix decisions. Quickly switch between your mix and a reference mix to help you identify what’s lacking in your low end. This technique is an easy way to reveal problems you may not have noticed.
5. Post Processing Techniques
These mixing techniques will give your bass even more character. They will also help your low end translate on different speaker systems.
Arrangement
Remember contrast is key. Sometimes the arrangement of your kick and bass can cause problems. For example, having a heavy bass play the entire time without breaks will make your song lose its impact. Also, try using your sub bass sparingly and get creative with bringing it in and out throughout your song. This method keeps your song interesting.
If you’re still struggling to nail a fat and powerful low end, then reevaluate the composition. Having a kick play with your sub or 808 bass will make low-end management difficult. When all else fails, try changing up the bassline pattern or swap out the kick.
Saturation
I always recommend coloring your bass and sub with saturation. Saturation adds presence, character, warmth, edge, and cohesion. Also, saturation will make it easier to hear your bass on small speakers like laptops, earbuds, and phones.
Moreover, try adding parallel saturation with Ableton Live’s “rectifier” preset or FabFilter’s Saturn. Parallel processing is an excellent technique used to give sounds power and punch without affecting the original sound source.
Chorus
Chorus is a fun tool to give your bass more character and stereo width. If you’re trying to achieve an analog sound, applying some slight chorus on your bass can mimic that imperfect analog sound. However, be cautious using chorus on the sub and lower bass. Applying stereo width to low frequencies can reduce punch and clarity.
Limiting
Limiting is very important. It helps level out all the notes to make them play at a consistent level. It also adds perceived loudness and power. I recommend limiting your bass on the track itself as well as parallel limiting to beef up your bass.
Conclusion
When creating and mixing, always keep your low end in the back of your head. The goal is to have a tight and centered low end. Avoid any bleed from the beginning, and figure out your kick and bass correlation early on. Doing so will help your session run smoothly. Finally, when in doubt, use your ears!