Icon Instructor Jerry “BigJerr” DiPhillippo takes you into Ableton Live 10 for a first look exploration of some new workflow and interface features.
Live 10 Workflow and Interface Features
The highly anticipated release of Ableton Live 10 brings some significant improvements, feature enhancements and additions, bug fixes, and much more.
Icon Instructor Jerry “BigJerr” DiPhillippo takes you into Live 10 to highlight some of the inspiring new improvements and features. In this video, you’ll learn how to work with split stereo panning, automation, Chase MIDI Notes, and multi-clip editing.
This milestone release packs a lot, and we’ve only begun to scratch the surface. Stay tuned for additional videos that delve deeper into Live 10 and Push!
Split Stereo Pan
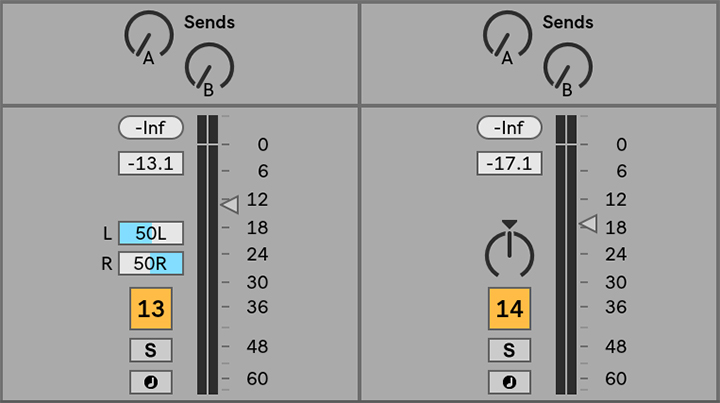
Panning stereo files left or right in previous versions of Live would cause level drops in the opposite channel. For example, hard right panning a stereo percussion loop with shakers recorded in the left channel and a cowbell in the right channel would cause the shakers to become inaudible. This complication required additional steps to hear both channels in either the right or left stereo field.
To remedy the issue, Live 10 introduces a new Pan control with two different modes: the default Stereo Pan Mode, and Split Stereo Pan Mode. In Stereo Pan Mode, the Pan control positions sounds in the stereo field. Whereas Split Stereo Pan Mode offers two independent sliders that let you adjust the position of the track’s left and right channels separately. You can switch between the two pan modes by right-clicking (PC) or CTRL-clicking (Mac) the Pan control and selecting a mode from the context menu. This improved feature is helpful because you can now quickly position both channels of a stereo file anywhere in the stereo field without losing any audio information.
Furthermore, selecting multiple tracks and adjusting one Pan control will change them all simultaneously. Also, double-clicking on the Pan sliders will reset them.
New Metronome
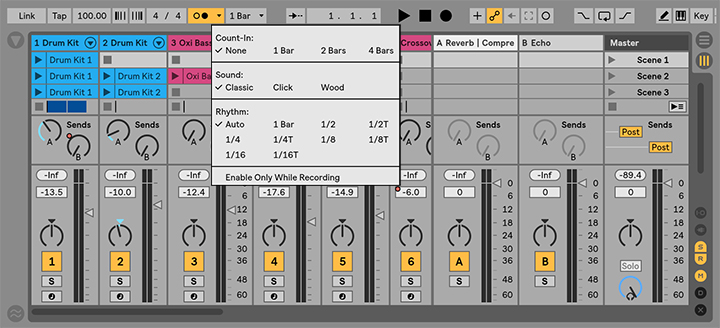
An easy way to record in time is to play along with the built-in metronome. When activated, the metronome will begin ticking in sync with the set tempo after pressing the Play button or launching a clip.
Live 10 updated the metronome with some additional options. It is now possible to choose between different tick sounds from the Metronome context menu. Also, you can select various tick intervals from the Metronome context menu. Furthermore, there is a new menu item called “Enable Only While Recording” which activates the Metronome only while recording is enabled.
Chase MIDI Notes
In previous versions of Live, you could not audition MIDI notes when starting playback from the middle of the clip. You had to start playback from the start of the clip. However, with the new “Chase MIDI Notes” command you can now audition MIDI notes even if playback begins after the MIDI note’s start time. This extremely helpful feature makes it much easier to edit pads, chords, and effects with longer MIDI notes without having to launch the clip from the beginning. The “Chase MIDI Notes” command is available from the Options menu.
Automation Updates
There are significant changes to automation. Live 10 implemented a global automation mode in the Arrangement View. Automation lanes are now toggled with the new Automation Mode button or the “A” key.
It is also possible to create automation breakpoints by double-clicking anywhere in an envelope view or automation lane. In addition, breakpoints are now quantized and will snap to the grid. It is also possible to lock breakpoints by holding “Shift” and moving them horizontally to retain the current value.
Furthermore, breakpoint values are now displayed when hovering over breakpoints instead of having to click them. Also, holding “Shift” is no longer needed for moving breakpoints past existing breakpoints. Lastly, a vertical editing helper line now appears when moving breakpoints in the Arrangement View or Detail View. This addition helps you align breakpoints much easier.
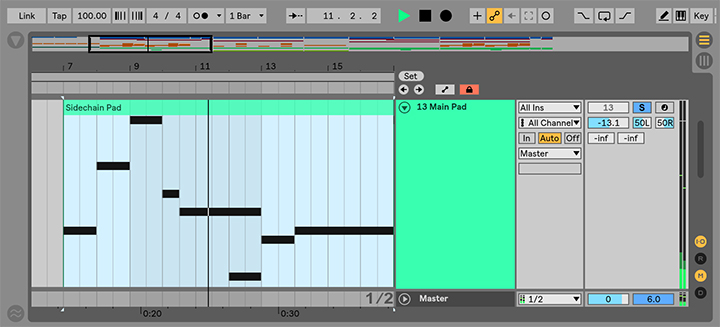
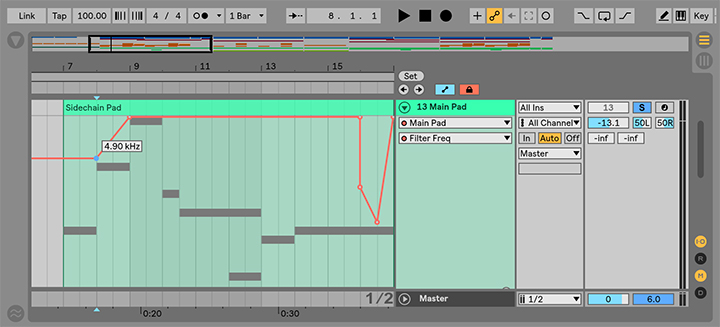
Multi-Clip Editing
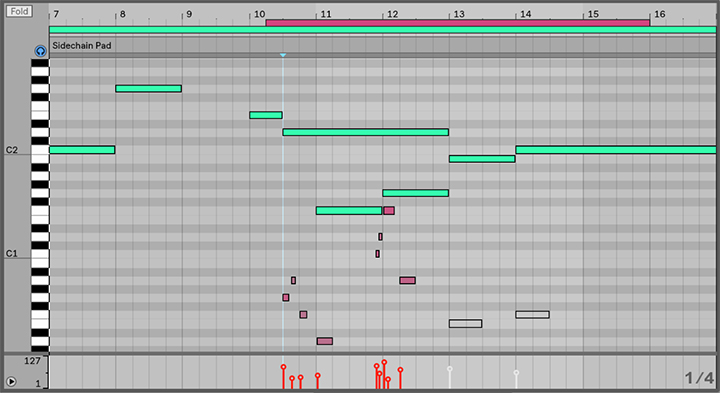
Live 10 introduces another extremely productive feature called multi-clip editing, which enables viewing up to seven MIDI clips at the same time from the Note Editor. This feature provides a convenient way to see notes between different clips when creating and editing musical ideas. It also allows you to edit material across separate tracks and scenes more quickly.
When multiple MIDI clips are selected, the notes from these clips will now be shown together in the Note Editor. The active clip’s notes will be displayed in that clip’s color, while the other inactive notes are greyed out. In addition, loop bars will appear above the Note Editor. Each loop bar represents a different clip in the current selection. Clicking or hovering over a clip’s loop bar or notes highlights the notes in that clip for editing.
Learn Music Production with Ableton Live
Delve deeper into the art of music production and sound design with Ableton Live. Icon’s comprehensive Music Production Programs offers like-minded musicians and industry professionals an immersive learning experience.
Learn essential knowledge to advance your craft while developing your signature sound using the industry’s most innovative software. Our extensive music production courses guide you through the fundamentals of music making while learning to master the ultimate software package for creative music production and performance.