Learn how to mix 808’s! These mixing tips will help get your 808 bass sounding fat, powerful, and punchy on various speaker systems.
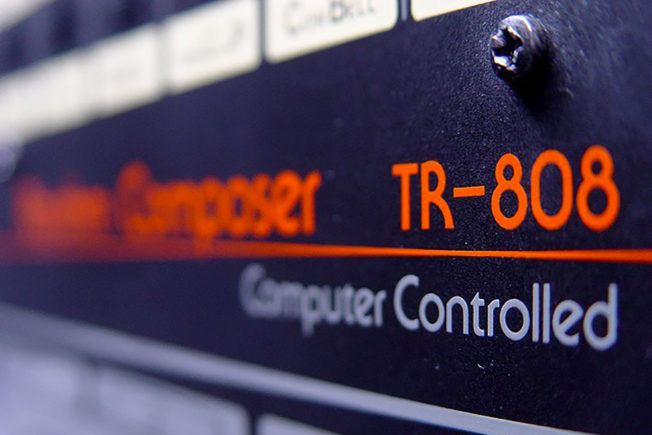
How The Roland TR-808 Revolutionized Music
Few instruments have influenced music and music culture like Roland’s legendary TR-808 drum machine. Its iconic drum sounds have transcended musical styles, defined genres, and attracted a global fan following. The 808 has even inspired a tribute celebration day around the world on August 8th (8/08).
The TR-808 is most famous for its big, booming bass drum. The renowned 808 kick drum is a staple in hip hop, techno, trap, pop, and other modern music productions.
However, mixing the 808 is challenging. Getting an 808 to cut through a mix is difficult. It competes with the kick and bass, causes various mix problems, and even disappears on small speakers.
These mixing tips will help get your 808 bass sounding fat, powerful, and punchy on all speaker systems.
1. 808 Sample Selection
Choosing a quality 808 sample that works with your song is crucial. 90% of what makes an excellent sounding 808 is selecting the best sample. Look for clean and punchy samples that have a consistent body. It will be easier to process and shape them to fit with other elements in the mix. Numerous sample packs offer a variety of 808 sounds to accommodate any genre.
You also have the option to synthesis 808 sounds. The foundation of an 808 is a sine wave with a fast attack envelope assigned to the pitch. Xfer Serum is an excellent choice for synthesizing 808’s. It offers several features to shape and modulate unique sounding 808’s. There are also dedicated 808 instrument plugins such as KICK 2, New Era 808, BazzISM, BD-808, and many others.
Either way, it’s essential you choose or create the best 808 sound to use as a starting point. Composing a track around a weak or insufficient 808 will cause problems later on.
2. Tune 808’s
808’s are tonal and have defined pitches that correspond to notes on the musical scale. When choosing an 808, think about its relation to the key of your song. Tuning the 808 to the key of your song will help it sit better in the mix. A tuned 808 also harmonizes with the kick, bass, chords, and other melodic parts.
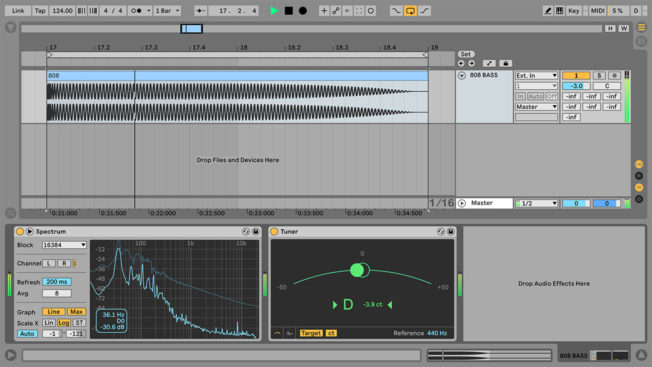
Tune your 808 by first determining the key of your song. Then identify the fundamental note of the 808 using a spectrum analyzer or Ableton Live’s Tuner. Next, transpose your 808 to a pitch that sounds good with the key of your song. This pitch is typically the root note of the scale. For example, if your song is in the key of F minor, then the root note will be F.
Root Vs. Fifth
Tuning the 808 to a fifth (+7 semitones) above the fundamental note is another effective technique. This method is useful when the kick and 808 fight to occupy the same frequency range. The fifth separates the two elements while allowing them to play in harmony.
3. Layer 808 Bass with a Kick Drum
Layering a punchy top kick sample over your 808 will help it cut through the mix. However, careful attention to the kick and 808 bass relationship is crucial. Moreover, getting the kick and 808 bass to sit right in the mix can be challenging.
The biggest issue with layering the kick and 808 bass is that they both dominate the same frequency ranges. A buildup of low frequencies causes clarity issues, phasing problems, and headroom loss. An untreated low-end will also cause your mix to lose punch, presence, and level. Put simply, masking or overlapping low frequencies are problematic.
The goal is to shape the kick and 808 bass so they can co-exist in the same frequency ranges. You want separation between the two sounds while also creating one cohesive sound. This challenge involves creating separation with either clip fades, equalization, or sidechain compression.
Create Separation with Clip Fades
An ideal mix will have the kick transient hit first, and then the 808 bass fades in. However, blending the two should sound like one seamless bass sound.
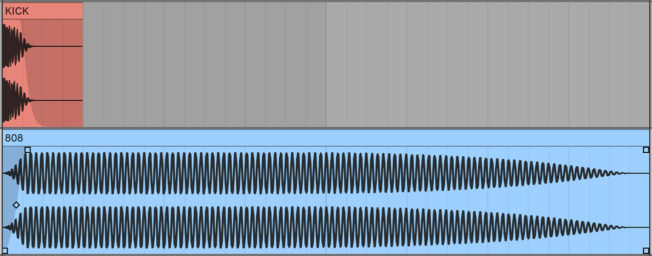
Create this separation with clip fades. Start by bouncing both your kick and 808 into audio files. Next, reduce the attack of the 808 with a clip fade. Then, reduce the kick’s tail with a clip fade. The 808 should fade in as the kick decays.
Use both your eyes and ears in this process to make sure the attack of the 808 doesn’t interfere with the kick. The kick should cut through, while still having a seamless blend.
This method is often better than using sidechain compression. It allows you to visually compare the volume levels and waveforms to create a more precise mix.
Create Separation with Sidechain Compression
Sidechain compression creates separation by quickly reducing the volume of the 808 when the kick plays. This method gives the kick drum space to punch through the mix.
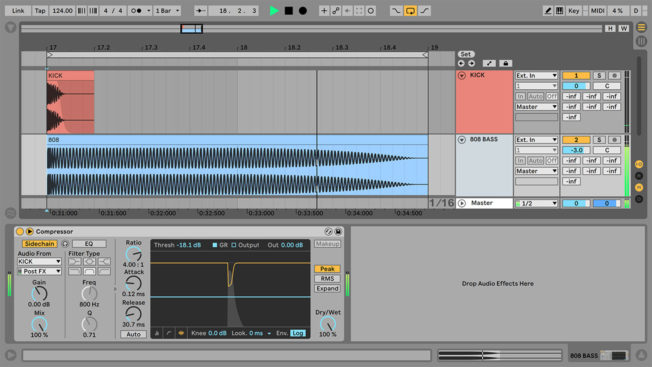
Sidechaining involves using a compressor that temporarily reduces the volume of a sound. Achieve this technique by loading a compressor on the 808 track. Then, choose the kick or another percussive sound as the external trigger source. Next, adjust the attack and release controls to balance the mix. Most DAWS have native compressor devices with sidechaining features.
4. Apply Multiband Distortion
Make sure your 808’s translate on small speakers that can’t reproduce lower frequencies like earbuds, laptops, and phones. Applying various harmonic enhancement like distortion, saturation, and bit-crushing will give the 808 presence. It also adds character, warmth, edge, cohesion, and more.
The best way to apply distortion is with multiband effects processing. Multiband processing is an effective technique used in sound design, mixing, and mastering. Splitting the frequency spectrum into independent and adjustable bands allows you to process those isolated frequencies with more control.
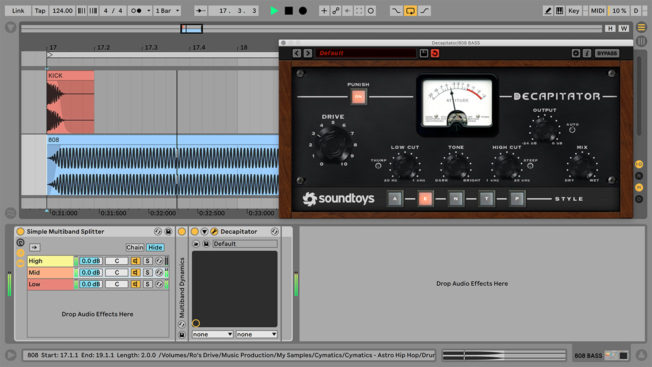
The goal is to process the mid and high frequencies while keeping the low-end clean. This method gives you a powerful sub that translates on mono speaker systems and enhanced harmonics that help define the 808’s character.
There are several approaches to applying multiband distortion. For example, you can create a multiband effects processing rack in Ableton Live and apply different distortion amounts to separate bands. Or, use distortion effect plugins that have multiband capabilities, such as FabFilter Saturn and iZotope Trash.
[yuzo]
Last, experiment with different distortion and saturation plugins on the separate bands. For example, try bit-crushing the high band and saturating the mid band.
You can also apply other effects and mixing techniques. For example, mono the low band, apply a tube amp to the mids, and add stereo width and compression to the highs. The creative decisions are in your hands!
5. Equalization
Cutting unnecessary sub frequencies from other instruments is a good place to start when trying to achieve a defined low-end. Using a high pass filter, go through all the elements in the mix and cut the low frequencies that conflict with the kick and 808.
Next, cut problematic sub frequencies from the kick and 808 with a high pass filter. Useless sub rumble takes up headroom, causes clarity issues, and other problems. Try cutting anywhere below 40 Hz to tighten up either sound. Conversely, if there is a lot of unnecessary or conflicting high-end energy, try cutting anywhere above 10 kHz with a low pass filter. You may be surprised how much louder and punchy the mix will sound after removing frequencies that don’t contribute to the sound.
Last, apply subtractive equalization where it’s needed. For example, use an EQ to create more separation between the kick and 808 if the kick isn’t cutting through. Or, carve out space for other elements in the mix with conflicting frequencies. For instance, other bass sounds, the snare, etc.
Moreover, use an EQ to sweep the frequency spectrum of the 808 to identify harsh resonances and unpleasant frequencies. Boost a bell curve with a tight Q and listen for harsh areas. Then cut those frequencies. Repeat the process to create a more pleasant sound.
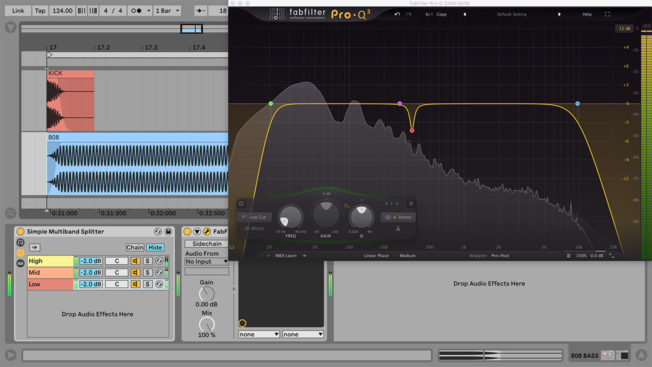
Finally, apply additive equalization if you want to emphasize tones. For example, fundamental tones and other musical overtones. Analog-modeled EQ’s are ideal for tonal work and sweetening. These EQ’s capture the warmth, character, and sound of vintage hardware equalizers. They also excel at emphasizing or attenuating certain frequency bands in a broad, musical manner to achieve clarity and punch.
6. Arrangement and 808 Length
Another crucial decision to consider with the 808 is its length. For example, short 808’s can leave space in a song that feels empty or less interesting. Conversely, long 808’s can have overlapping notes or tones that mask other elements and muddy up the mix. A build-up of unwanted low-end clutter will rob the mix of punch and energy.
Furthermore, consider the placement of your 808’s. It’s essential your 808’s groove with the drums. If you’re working with audio, cut the tails to make space for other elements and to allow the low-end breath. Also, use clip fades to make the 808 decay smoothly. And, if you’re working with midi, shorten the notes, and adjust the decay and release controls.
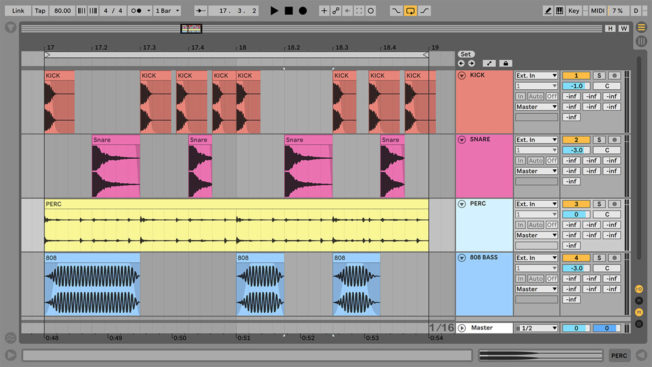
Giving your 808’s space, and making room for elements like the kick and snare will give your song a stronger groove. It also adds clarity and space that will make your 808 sound fatter and present. These moves also sound more interesting than an 808 that continually plays without breaks.
If you’re still struggling to nail a fat and powerful 808, then reevaluate the composition. Having the main kick play with an 808 bass or a sub will make low-end management difficult. When all else fails, try changing up the bassline rhythm or swap out the kick. You can also try playing the 808 an octave or fifth higher (+7 semitones).
7. Optional 808 Processing
Creating punchy and powerful 808’s is a multistep process that may need additional processing. Below are optional methods to enhance your 808 bass further.
Applying Additional Effects
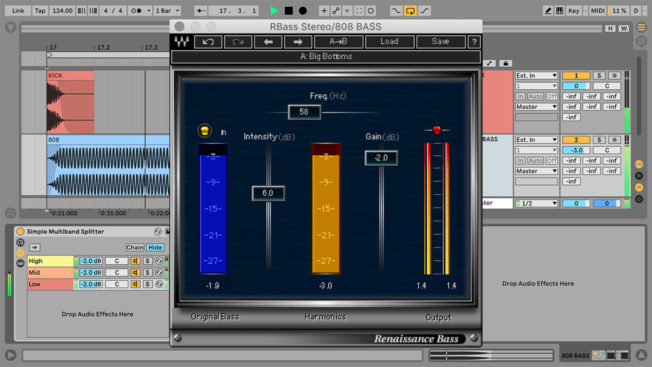
Several audio effects on the market will enhance 808’s. One example is Renaissance Bass by Waves. R-Bass delivers richer, deeper lows that sound great on any speaker system.
Octave Layering
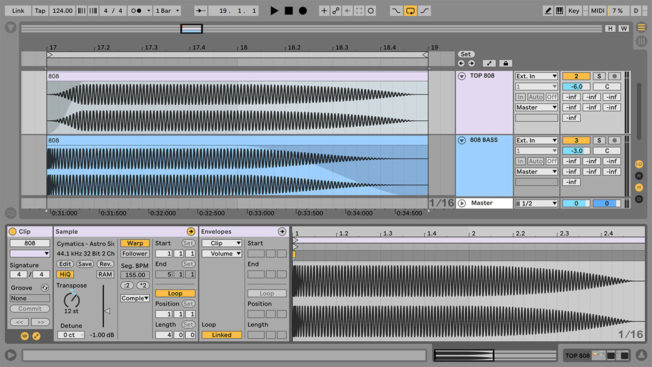
Layering a copy of the 808 one octave higher adds character to the sound. First, duplicate the 808 track. Next, process the new top layer. Transpose the top 808 up one octave. Add a clip fade to remove the attack, so it doesn’t conflict with the original 808. Then, use a high pass filter to cut conflicting low frequencies below 120 Hz. Last, apply additional effects if needed to change its character.
Multiband Compression
Applying multiband compression can give your 808 presence and energy. Multiband compression will also glue your kick and 808 layers. This move makes the two separate sound unified, cohesive, and balanced.
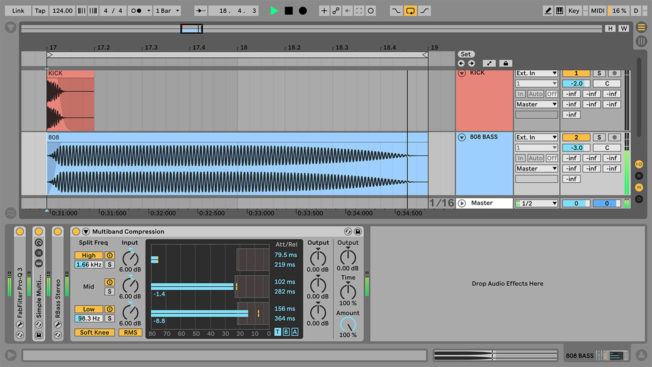
Multiband compression is an advanced form of compression. A multiband compressor splits the frequency spectrum into separate bands. Each frequency band also has dedicated compression settings. Applying different amounts of compression to the separate frequency ranges gives you more control.
Conclusion
There are no rules to creating fat 808 basses. These guidelines offer suggestions to help you get closer to creating powerful and punchy 808’s.